Cisco just released yesterday (November 26) an updated version of VIRL (Virtual Internet Routing Lab), version 1.0.0….and let me tell you, it has some great enhancements! You now have the ability to modify parameters on a link…you can configure latency, packet loss and jitter. AND they have increased the node count to 20 (up from 15). This is WAY cool stuff! First though, you need to upgrade to the new version, which I just did.
NOTE: This post is just a high-level overview of a VIRL installation, so you can get a taste of what it takes to install it. Please reference the noted links below to get the full instructions when you are ready to install VIRL. A great place to start is the Cisco VIRL homepage.
STEP ONE: Download the new VIRL version. Normally you have to wait for an email which has the download links and grab the image within 3 days (after which the links expires). But Cisco has finally setup a “self-service” download process which allows current VIRL users to download updated images whenever you want. (See this Cisco VIRL announcement for lots more details.) From your current running VIRL install, you can open up a terminal window to grab the new image…since I’m running VIRL on a bare-metal installation, the commands were…
STEP TWO: Installation. Unfortunately, you cannot do an in-place upgrade…you must do a fresh install. Go to the VIRL installation documentation and pick your method (for me, it’s ISO to Bare-Metal), and follow the directions. It will take time, so be patient and follow each step carefully.
STEP THREE: Troubleshoot issues. Hopefully your installation will just work. However, in my case, I had an issue…the “linux-bridge-agent” was not up and running…
It took a lot of time to figure this one out, but I found a posting that addressed this issue. It has to do with running VIRL on a bare-metal server that does not have the minimum required 5 physical interfaces. You can setup dummy interfaces to handle this, which I had done, but there were some additional steps needed to fix some bugs…here is the link if you have the same issue.
So, now things are working properly…
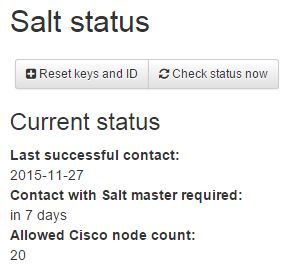
Time to install the license key and make contact with Cisco’s salt servers…
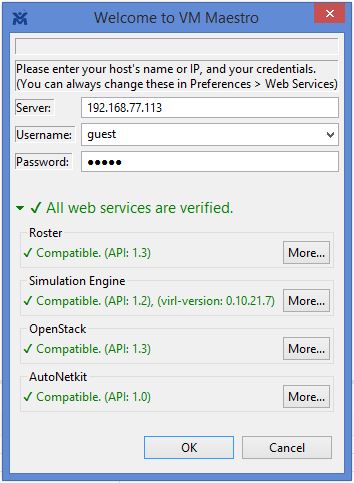
At this time, the VIRL installation is up and running properly. Now it’s time to install the frontend to VIRL, called VM Maestro, so you can create and run network simulations. Just follow the instructions, and this is a very quick step. When logging into VM Maestro for the first time, make sure and enter the IP address as well as the password…only then will the client make the proper connections and the web services go “green”…
Now that everything is up and running, I configured a simple 4 node router simulation…and added 100 ms of latency between node San Francisco and Los Angeles, like so…
Before I failed any of the links, the ping results from San Francisco to New York were…
After I failed a couple of links, which forced the traffic through Los Angeles to reach New York, ping results showed the higher latency…
This is VERY cool…and there is much more to this new version…I have only just touched the surface of all the new features. Cisco has done a great job of putting a fully functional network simulator into our hands….let’s make great use of it, and let’s give Cisco our thanks!! They deserve it!!


