Greetings!! So I’ve been playing with the latest Cisco VIRL release (v1.0.0), and let me say for the record, I like it!! Of course I’m still relatively new at VIRL and have much to learn, but I am very impressed by the latest release. AND I’m very pleased with the new bare-metal VIRL installation I have!
If you recall, several months ago, I installed VIRL on my new desktop system (Quad core i7 processor, 32 GB of RAM, fast SSD and storage drives, Windows 8.1 and VMware Workstation 11). VIRL ran very well on that system, which is to be expected, but there were times when my PC just behaved a bit strangely…a bit of pausing, some hiccups…you know what I mean. Of course I was running other power hungry programs at the same time…Photoshop and Lightroom. This installation is a bit more complex…you have a physical PC, running Windows 8.1 for an operating system, running VMware 11, which runs a VM (Virtual Machine), which is running Linux, which then runs it’s own VM that runs the network simulation (routers, switches, etc). Whew…it’s complicated just typing all of that out!
So…I decided to upgrade my Dell 2950 PowerEdge server a bit. I added RAM and another processor, so it now has: dual Quad-core Zeon processors (3 Ghz); 16 GB RAM; and fast 15K RPM drives. Let me tell you…this thing screams. Yes, it has less RAM than my PC, but now it will be dedicated to just Linux and the network simulation…nothing else. The new setup is much simpler now…a physical server, running Linux, which runs a VM for the network simulation.
How does it work? NICE!! I setup a test 20 node router simulation and cranked it up…it took about 2.5 minutes for all nodes to go ACTIVE, and another 1.5 minutes for BGP and OSPF convergence to complete. Here’s the topology for the test…
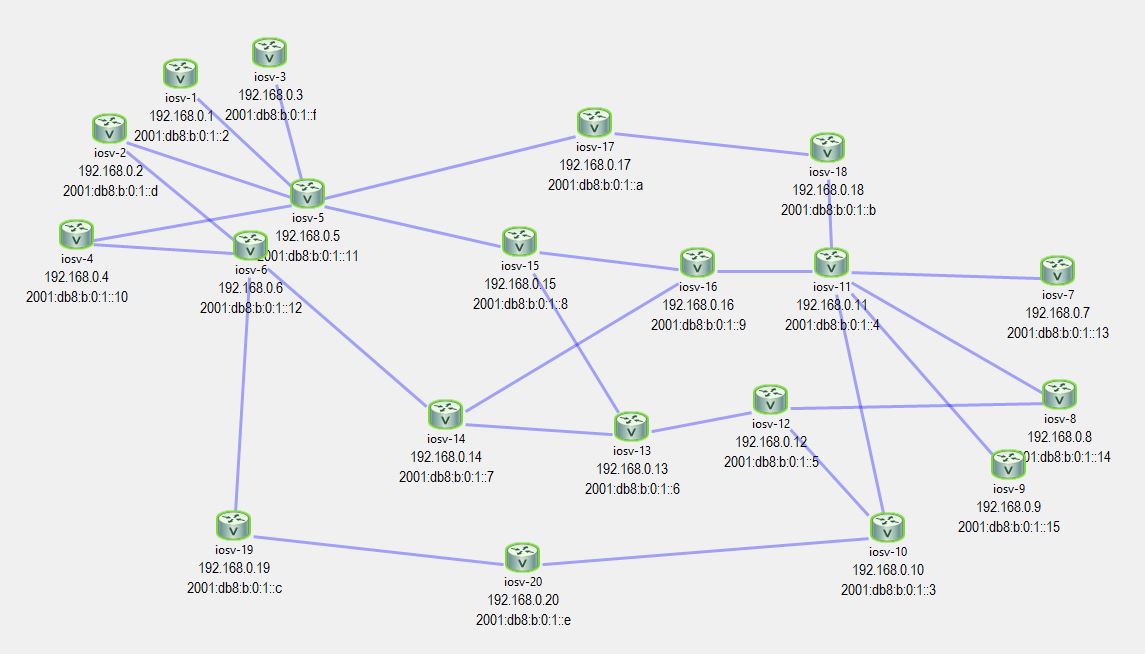
20 Node VIRL Simulation
And here are the resources used…
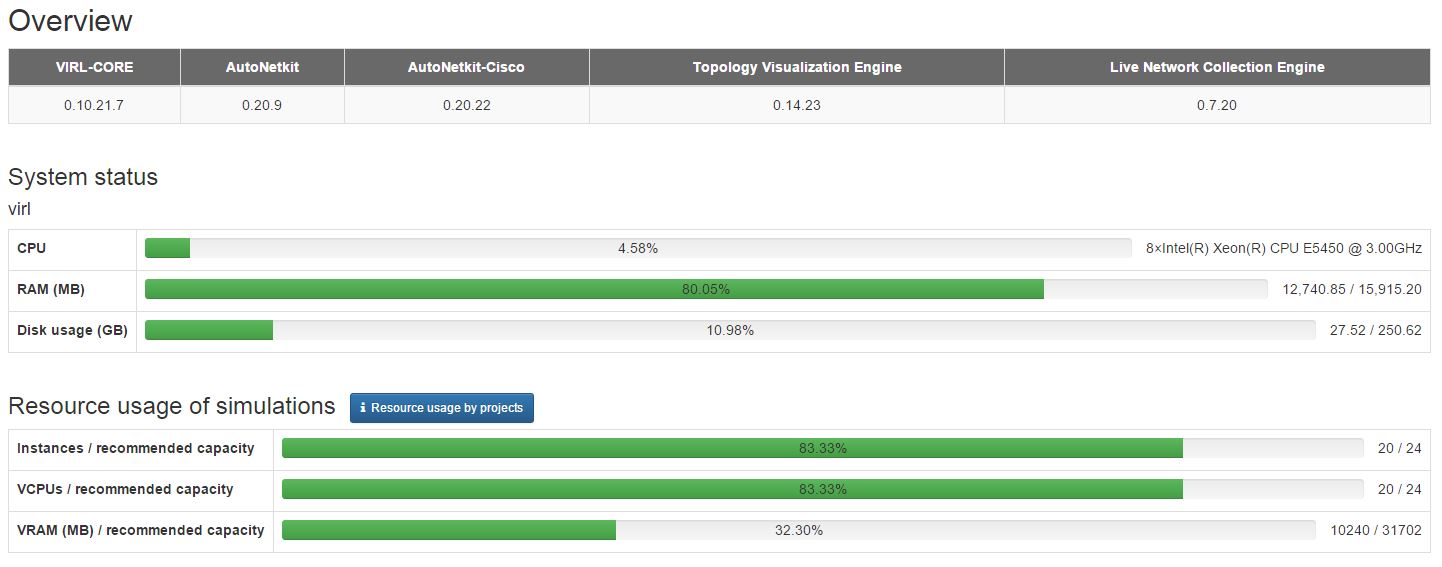
Resources used for 20 node test
Everything is looking very good here. Of course, I am using just IOSv nodes (routers)…they are the least CPU and RAM intensive. If I were using other node types (NX-OSv, ASAv, CSR1000v, etc) then I would be running out of resources sooner and would have to balance the number and type of nodes I could run in a simulation. What will help is to upgrade my RAM to 32 GB, which I will do early next year.
Do you like what you see? Then take a look at VIRL…I think you will be very pleased.